Availability: | |
---|---|
Quantity: | |
SO-HF10B-UA
SMICO
09140100303
Product Details
H Modular Frames
Grounding system according to VDE
Die cast zinc construction
Hinged frame (except item type 1 – one piece)
A-B, a-b, A-C, a-c, A-D, a-d, A-F, and a-f orientation available depending on 2, 3, 4, or 6 insert ’module’ requirement
Mating cycles ≥500
For use in standard hoods and housings
SMICO H Modular
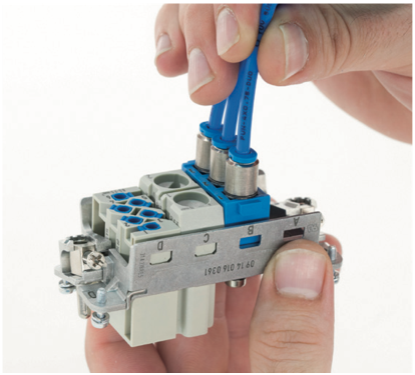
The H-Modular series is a system consisting of insert modules and frames into which the insert modules fit. These in turn may be fitted to standard H housings. The system allows a variety of insert configurations within the one connector assembly. The HModular system is designed to meet specific requirements of individual customers and offers flexibility when considering connections for signal, power & pneumatic lines when a solution is required with one connector Apart from the quality of the crimp connector, the right choice of the assembly tool is the basic element of a reliable connection. SMICO offers appropriate crimping tools for different levels of automation for all connectors.
Specifications
Dimensions | 57 mm L x 34.5 mm W x 36.4 mm H |
Material | Die Cast Zinc |
Series | H-Modular |
Size | 10B |
Specifications | A to B Marking, 40 A Rated, 1 kV Rated, 18 to 14 AWG Wire, 2 Position |
Suitable For Use With | 3 Modules |
Temperature Rating | -40 to 125 deg C |
Type | Female/Male Retaining |
The module heavy-duty connector is one of the SMICO heavy-duty connectors. Many customers do not guide how to install the module heavy-duty connector. Let's take a look at the correct installation method.
Materials needed: frame, module
Step 1: Loosen the screws on the left and right sides of the metal frame
Step 2: After the screws are loosened, the metal frame can be opened so that the module can be put in
Step 3: Put the module into the frame so that the protrusions on both sides of the module are put into the holes on both sides of the metal frame
Step 4: After placing the required modules, re-tighten the screws
The heavy-duty connector of the module is installed. If there is a shell outside, then put the whole frame into the shell and fix it.